
LinkedIn Patches #81 Answer & Analysis
Stuck on LinkedIn Patches #81? Get spoiler-friendly Patches hints, the final grid solution, and a clear step-by-step explanation for today’s LinkedIn Patches puzzle.
This page includes the final answer and full analysis for LinkedIn Patches #81. Use the hints first if you want to solve the puzzle before revealing the answer.
LinkedIn Patches #81 Hints
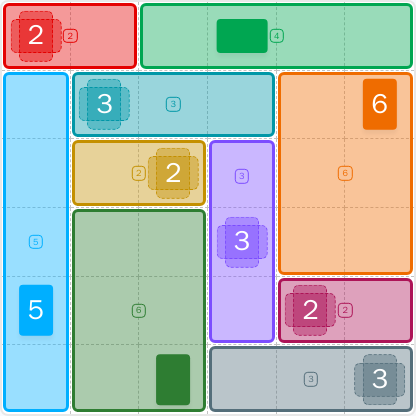
The biggest help in today's LinkedIn Patches puzzle is the border. Look for the long patches that touch the left edge, top edge, and right edge, because they have very few placement options.
The top-left and top-right areas are especially restrictive. When a patch already touches a corner, its shape usually becomes obvious much faster than the center pieces.
There is a long strip across the top and another compact patch just below it. Those pieces create a thin corridor that helps separate the upper-left cluster from the upper-middle region.
In the middle of the grid, the smallest patches act like dividers. Place the two-cell regions carefully so they do not trap any isolated cells on either side.
Once the upper and right-side patches are set, the lower half becomes a sequence of horizontal strips. This is usually where the final LinkedIn Patches answer clicks into place.
Still Stuck? Click on Reveal Patches #81 Answer below.
LinkedIn Patches #81 Answer
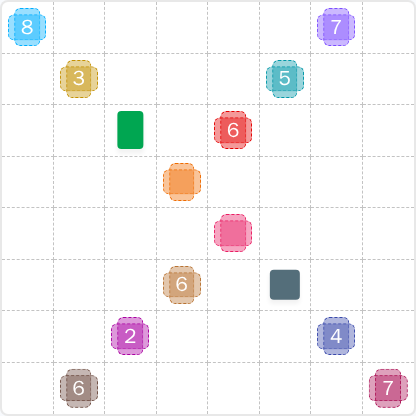
Original Puzzle
Final Answer
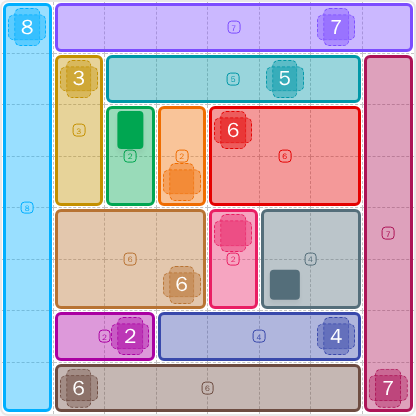
How to Solve LinkedIn Patches #81
Previous Patches Answers
Play Unlimited Patches Games
Enjoy unlimited Patches and other puzzle games anytime. No daily limits, just endless fun!
Play Now - Unlimited GamesMore LinkedIn Games Answers for Jun 6, 2026


Patches #81 FAQ
The full LinkedIn Patches answer for 2026-06-06 15:00:14 is shown on this page in the solved layout and step-by-step guide.
Start with the forced edge patches, then place the narrow center pieces, and finish with the lower bands. That is the simplest path for today's LinkedIn Patches puzzle.
The best LinkedIn Patches #81 hints are to anchor the left edge, top edge, and right edge first. Those borders sharply reduce the remaining possibilities.
Each number shows the size of the connected patch. For example, a 6 must cover six orthogonally connected cells.
R2C7 means row 2, column 7. Rows are counted from top to bottom, and columns are counted from left to right.
Focus on patches with the fewest possible placements first, especially long edge strips and small patches that divide the board.
The page includes today's Patches solution with a clear summary of the grid solutions and the reasoning behind them.